How to Uninstall Creative Cloud on Mac and Clear the Adobe Leftovers
To uninstall Creative Cloud on a Mac, first remove every Creative Cloud app from the desktop app under Apps, then All Apps. Next, run Adobe's Creative Cloud Uninstaller and choose Uninstall. If it refuses, fix the stale app record or use Adobe's Cleaner Tool, then clear the Adobe folders and login items left behind.
Most people looking up how to uninstall Creative Cloud on Mac hit the same wall: the uninstaller says apps are still installed. This guide follows Adobe's own order. It then covers what Adobe's pages skip, from leftover folders to a final check that nothing still runs.
Why dragging Creative Cloud to the Trash is not enough
The Creative Cloud desktop app installs and updates every Adobe app you use, and it runs helpers that start with macOS.
We checked a current install on macOS Tahoe 26.6. It had two launch agents in /Library/LaunchAgents and an installer helper in /Library/PrivilegedHelperTools. A Finder extension kept running with the app closed.
None of that lives in the icon you would drag. Adobe's admin guide for uninstalling apps is plain about it: moving apps to the Trash removes product files, but not the licensing information. Many apps keep background helpers like this.
Adobe also will not remove the desktop app while any Creative Cloud app is still installed. That is why Step 1 comes first.
Before you uninstall Creative Cloud on Mac: files, fonts and your subscription
- Your files. Adobe warns that files not synced to your account could be lost. Let cloud documents and Libraries finish syncing first. Older accounts may also have a local Creative Cloud Files folder. Adobe ended its sync for personal accounts between February 2024 and February 2025, so search Finder for it and copy it somewhere safe.
- Your fonts. Adobe Fonts are added through the desktop app. Adobe's font help says they become unavailable when the app is not running, so expect them to leave your font menus.
- Your plan. Removing the software does not end it, and Apple states that deleting an app does not cancel a subscription bought with it. To cancel, follow Adobe's steps: sign in to your Adobe account, open Plans and payment, choose Manage plan, then Cancel your plan. If you paid through Apple, use Apple's cancel steps instead. Each plan is cancelled on its own.
- Your presets and plug-ins. Copy any presets, workspaces and third-party plug-ins you want to keep. Adobe only offers the two newest versions of its apps. Keep old installers if you rely on an older one.
- An admin password. You will need one. On a work Mac, Adobe notes you may not have the rights to uninstall. Ask your admin.
Step 1: Uninstall each Creative Cloud app from the desktop app
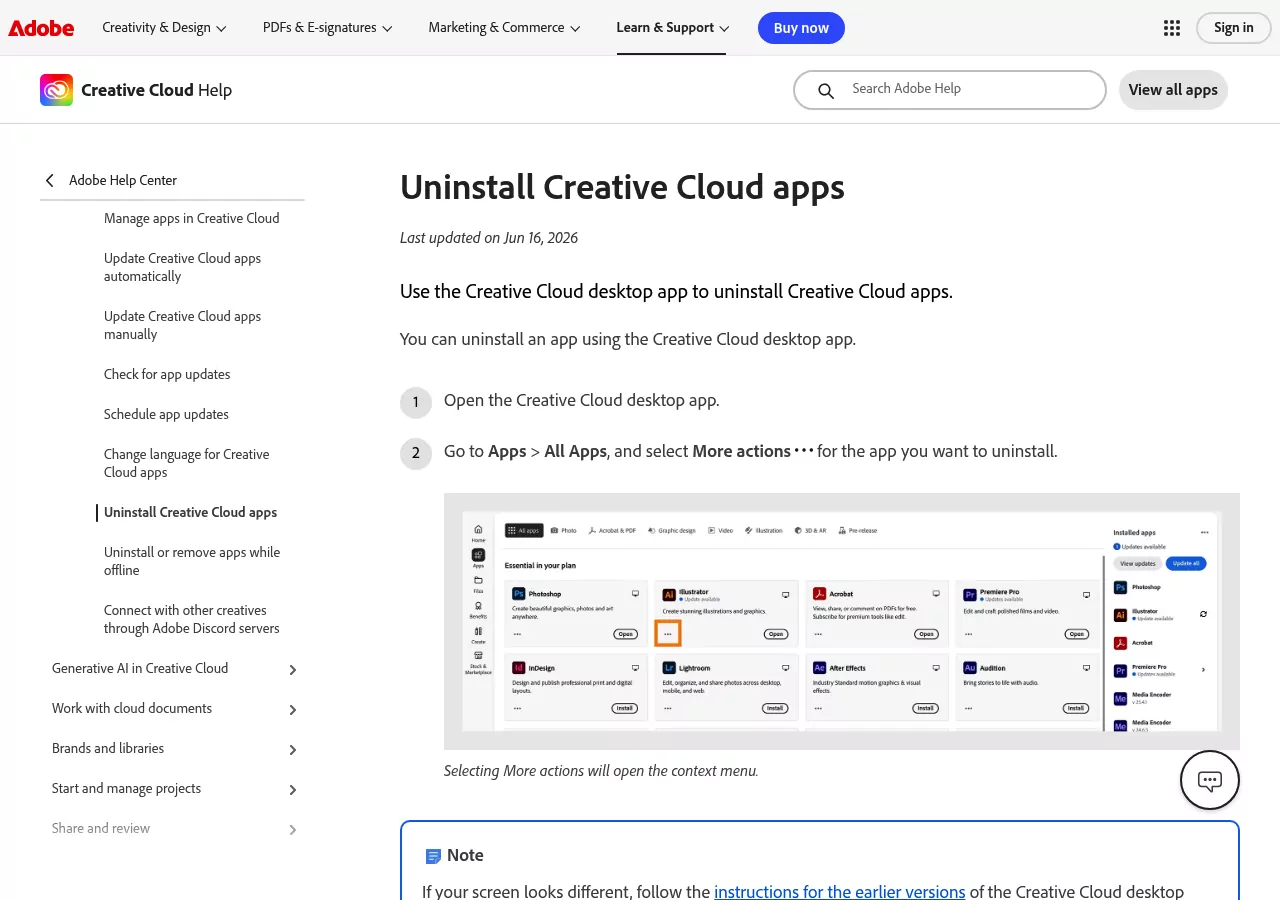
This is the step people skip, and it blocks everything else. Adobe's page on uninstalling Creative Cloud apps gives the route.
- Save your work and quit the app you are removing.
- Open the Creative Cloud desktop app.
- Go to Apps, then All Apps, and select More actions (the three dots) for the app.
- Choose Uninstall.
- Choose Remove or Keep. Remove deletes the app's notifications, alerts, interface settings, plug-ins and other preferences. Keep leaves them on the Mac. Cancel stops.
Repeat for every app you have. Adobe's own screenshot shows two versions of Media Encoder listed as separate entries, and Acrobat sits there too when Creative Cloud installed it. Remove each one here.
If the desktop app will not open or an app is missing from the list
Adobe has an offline route. Open the Applications folder, then the folder for the app you want to remove. Look for a shortcut named Uninstall or [App Name] Uninstaller, double-click it and follow the prompts.
Adobe also keeps per-app uninstallers in /Applications/Utilities/Adobe Installers. Run the one for the app you are removing.
Step 2: Uninstall Creative Cloud on Mac with Adobe's uninstaller
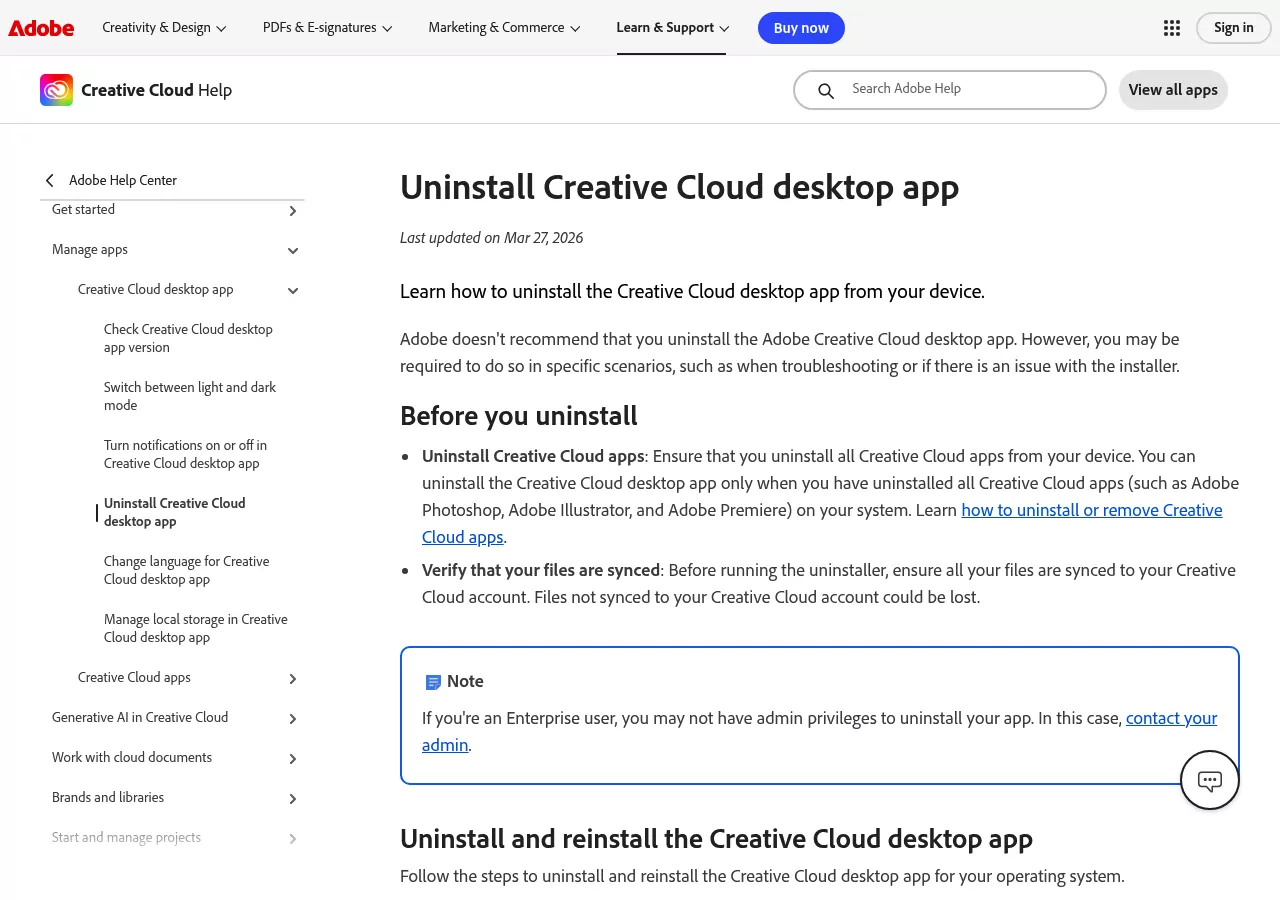
With the apps gone, remove the desktop app itself. Adobe's page on uninstalling the Creative Cloud desktop app offers the Creative Cloud Uninstaller for Mac in three builds. One is for macOS 10.12 or later, one for Mac computers with Apple silicon, and one for macOS 10.11 or earlier.
- Download the build for your Mac and extract the zip file.
- Double-click
Creative Cloud Uninstaller.dmg. - If macOS warns you about opening it, select Open.
- The window offers Repair and Uninstall. Adobe suggests Repair when you are fixing a fault. To remove Creative Cloud, choose Uninstall.
- Select Close when it confirms.
The same uninstaller may also be on disk. On the install we checked, the Adobe Creative Cloud folder in Applications held an Uninstall Adobe Creative Cloud shortcut to /Applications/Utilities/Adobe Creative Cloud/Utils. The fresh download is safer if that copy is damaged.
Step 3: When Adobe says Creative Cloud apps are still installed
Mac users on Adobe's community forum report a message that starts "Couldn't uninstall Creative Cloud for desktop." It goes on to say Creative Cloud apps that need it are still on the computer.
The same stale app record that makes removed apps look installed can also block the uninstaller. Adobe's page on removed apps that still show as installed names four causes:
- An app was removed without Adobe's uninstaller, say by dragging it to the Trash.
- A database file called
opm.dbis corrupted. - The desktop app is out of date.
- The install itself is damaged, which is a job for Step 4.
Work through these fixes in order.
- Open the desktop app and recheck Apps, then All Apps. Uninstall anything still listed.
- Open
/Applications/Utilities/Adobe Installersand run the uninstaller for the app that causes trouble. - Quit the desktop app, then reset its app record. Delete only the one file named here.
- In Finder, choose Go, then Go to Folder, and enter
~/Library/Application Support/Adobe/OOBE. If a file namedopm.dbis there, move it to the Trash. Adobe says the app builds a fresh one when it next opens. - Open the desktop app, select the Account icon, choose Sign out, then sign back in. This also signs you out of your Creative Cloud apps.
- If the desktop app is out of date, reinstall the latest version from Adobe's download page.
- On a managed work Mac, ask your admin.
- Restart your Mac and run Step 2 again.
Step 4: Use the Creative Cloud Cleaner Tool only as a last resort
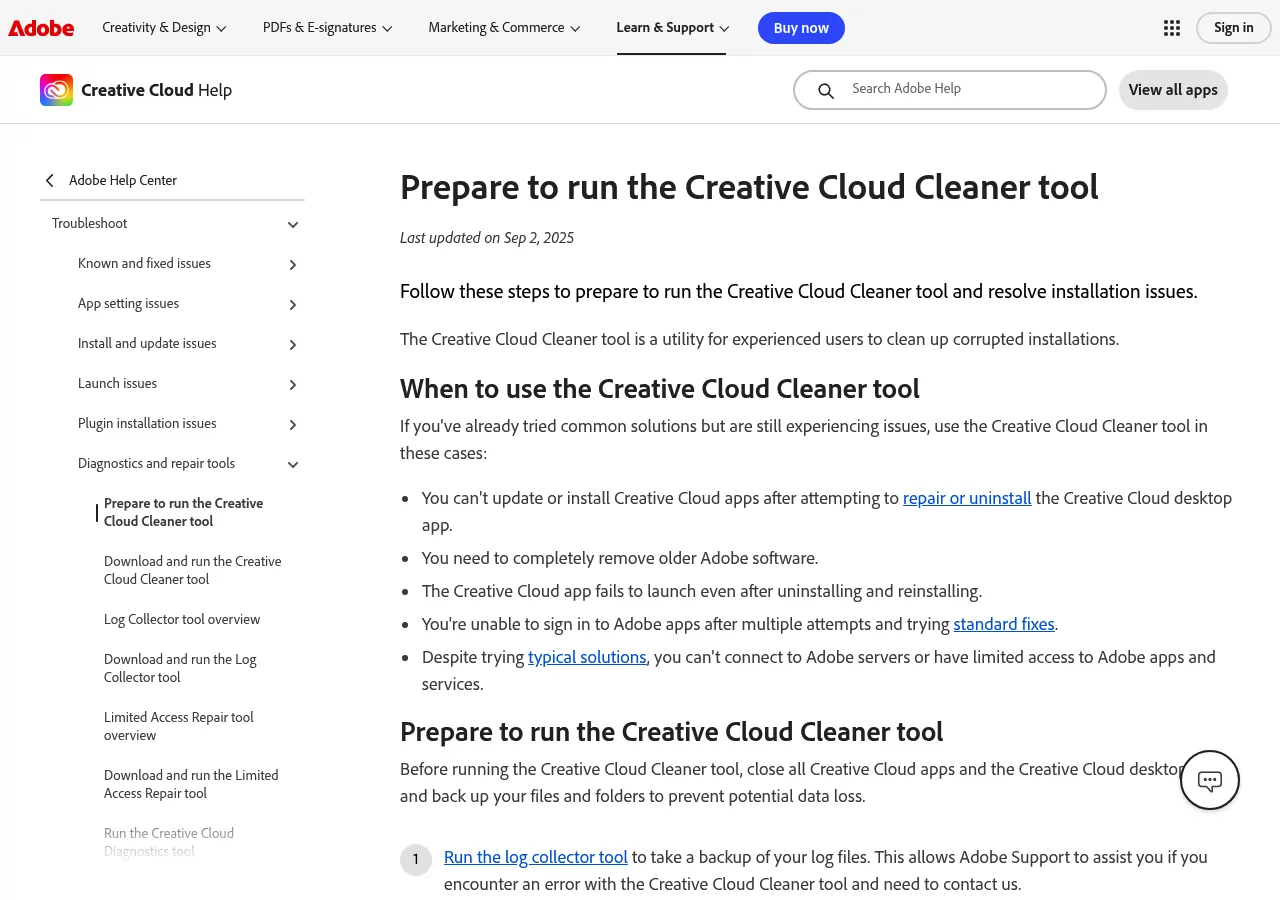
Read this before you run it. Adobe describes the Creative Cloud Cleaner Tool as a utility for experienced users to clean up corrupted installs. Adobe warns that a clean install with it removes all Creative Cloud apps and data, so back up first.
Prepare the way Adobe asks:
- Close every Creative Cloud app and the desktop app.
- Run Adobe's Log Collector tool, so Adobe Support can help if the Cleaner fails.
- In Activity Monitor, quit Creative Cloud Core Service and Adobe Content Synchronizer. Adobe also lists Creative Cloud, Creative Cloud Content Manager, Creative Cloud Libraries Synchronizer, Adobe Content Synchronizer helper and Creative Cloud Interprocess Service. Apple explains Quit and Force Quit, and Force Quit can lose unsaved data.
- Copy
~/Library/Application Support/Adobe/CoreSync/somewhere safe, along with any plug-ins, presets and preference files you want.
Then follow Adobe's Mac steps:
- Download and open
AdobeCreativeCloudCleanerTool.dmg. - Pick your language from the menu in the upper right.
- Read the licence agreement and select Accept.
- From the menu in the upper right, choose CC Apps, Creative Cloud & CS6 Products.
- In the table, select only the entries you mean to remove, then select Cleanup Selected.
- When you see "Adobe Creative Cloud Cleaner Tool completed successfully", select Quit and restart your Mac.
Skip Fix Host File unless you cannot reach Adobe's servers at all. It repairs your Mac's hosts file, and Adobe saves the old one as hosts_bkup in the same folder.
Step 5: Remove the Adobe folders that stay behind
Check what else is from Adobe first. Adobe's page on deleting leftover Adobe files says to remove the shared Adobe folders only if no other Adobe apps are on the Mac.
So if you keep Acrobat, Acrobat Reader or any other Adobe app, leave alone anything named Acrobat, Reader or ARMDC. Adobe's updater reference ties ARMDC, including /Library/Application Support/Adobe/ARMDC, to the updater for Acrobat and Reader.
While any Adobe app stays, open these Adobe folders and remove only subfolders named for Creative Cloud or for the apps you removed, not the whole Adobe folder.
Open Finder, choose Go, then Go to Folder, and check these in your own Library. The tilde means your home folder.
~/Library/Application Support/Adobe-
~/Library/Preferences: the Adobe folder, folders such as Adobe Photoshop 2025 Settings, and files that start withcom.adobe -
~/Library/Caches/Adobeand~/Library/Logs/Adobe -
~/Library/LaunchAgents: files that start withcom.adobe -
~/Library/Group Containersand~/Library/Containers: folders with adobe in the name
Then the shared places, which ask for an admin password:
/Library/Application Support/Adobe-
/Library/LaunchAgents,/Library/LaunchDaemonsand/Library/PrivilegedHelperTools: items that start withcom.adobe /Users/Shared/Adobe
To see it all in one list, paste this into Terminal. It only reads and prints paths. It changes nothing.
find ~/Library /Library /Users/Shared -maxdepth 2 -iname '*adobe*' 2>/dev/nullOn the Mac we checked, with the desktop app still installed, it printed 62 paths. Run it after Steps 1 to 4 to see what is left. Then drag each leftover to the Trash in Finder, one at a time, so a wrong pick can be undone.
Adobe Genuine Service removes itself once every Adobe app is gone. If it stays, run AdobeCleanUpUtility from /Applications/Utilities/Adobe Genuine Service.
Never delete anything inside /System, because that volume is protected and nothing from Adobe lives there. If disk space brought you here, this look at disk space viewers, Finder included, shows what else is large.
Step 6: Turn off Adobe login items and extensions
Open System Settings, then General. On macOS Sequoia 15 and later the pane is Login Items & Extensions. On Ventura 13 and Sonoma 14 it is called Login Items.
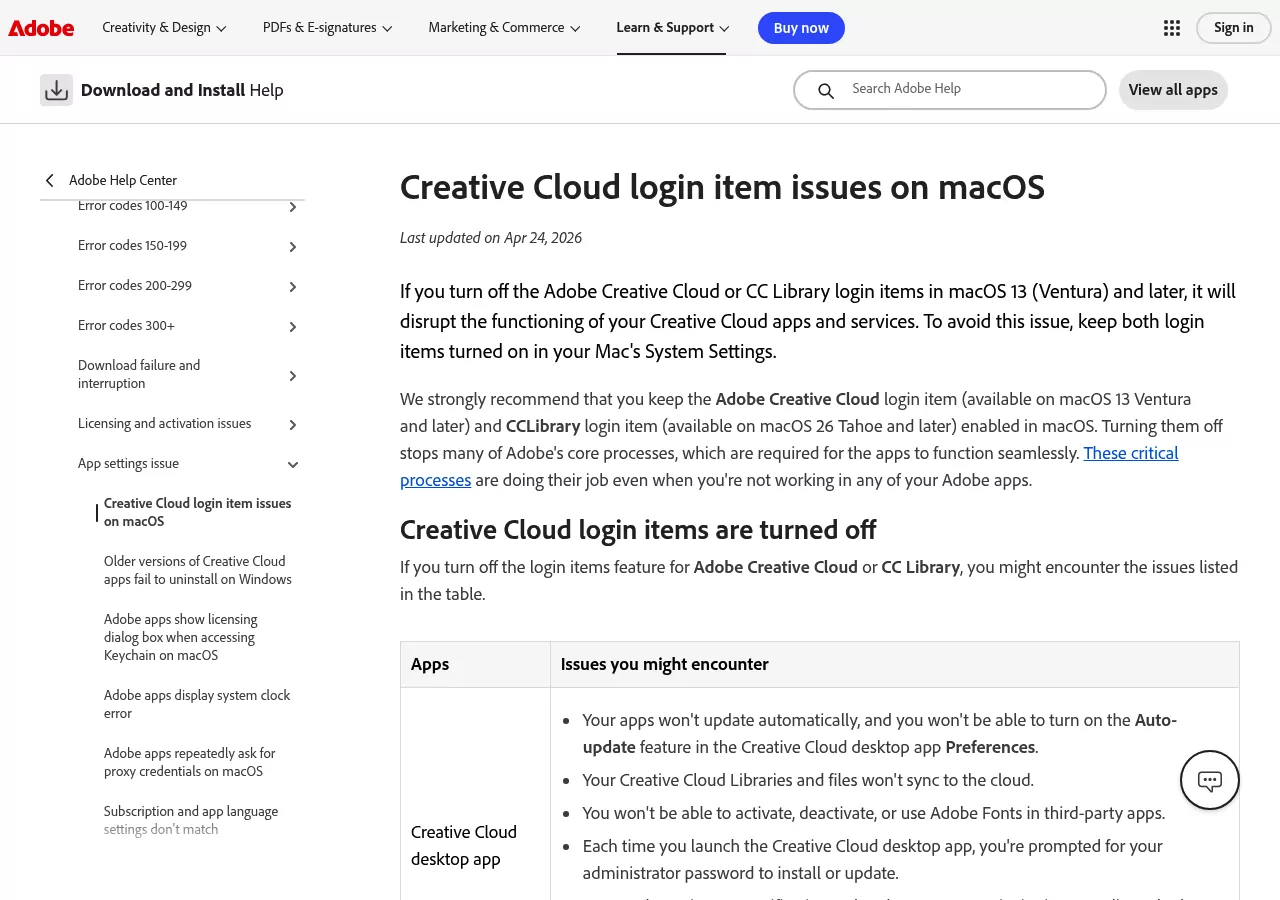
Only do this when you are removing Creative Cloud. Adobe warns that on a working install, turning these off stops app updates, file sync and Adobe Fonts in other apps.
- Open at Login: select any Adobe entry and click the minus button.
- Background items: this section is called Allow in the Background on macOS Ventura 13, Sonoma 14 and Sequoia 15. On macOS Tahoe 26 and later it is App Background Activity. Adobe's login item page names two entries: Adobe Creative Cloud (macOS 13 and later) and CCLibrary (macOS 26 and later). Switch both off.
- Extensions, on macOS 15 and later: look under Added extensions and Finder for an Adobe entry. On the Mac we checked, the Finder extension was named Adobe Content Synchronizer Finder Extension. Click the Info button, turn it off, then click Done.
Confirm nothing from Creative Cloud is still running
Restart your Mac, then run three quick checks.
- The Creative Cloud icon is gone from the menu bar.
- In Activity Monitor, search for Adobe, then for Creative Cloud. Nothing should appear.
- For a Terminal check, run the line below.
pgrep -ilf "adobe|creative cloud"It lists any running process whose name or path holds either phrase, in any case, and prints nothing when the Mac is clear. On the Mac we checked, with the app window closed, it still found the Finder extension running from /Applications/Utilities/Adobe Sync.
If you kept Acrobat or Reader, matches from those apps or their updater are expected. A match that points into a Creative Cloud folder means a step above was missed.
Reinstalling Creative Cloud cleanly later
Download a fresh installer from Adobe, sign in, then reinstall only the apps you need, one at a time. Kept settings can only be picked up again if you skipped Step 5, because that step clears the folders they live in.
Frequently Asked Questions
Does uninstalling Creative Cloud cancel my Adobe subscription?
No, removing the app leaves the plan running. Cancel under Plans and payment in your Adobe account, or through Apple if you subscribed there. Adobe says your access lasts until the end of the billing period.
Can I remove Creative Cloud but keep Photoshop?
No. Adobe only lets you uninstall the desktop app once every Creative Cloud app, Photoshop included, is gone. The desktop app is what installs and updates them.
How do I stop Creative Cloud opening at startup without uninstalling it?
In the desktop app, choose Creative Cloud > Preferences from the menu bar, open General, and turn off Launch Creative Cloud at login. Leave the background items on, since Adobe says switching them off breaks updates, sync and fonts.
Will uninstalling Creative Cloud remove Acrobat Reader?
Not on purpose: the free Reader is its own install, and Adobe removes it on a Mac by moving the app to the Trash. Adobe does not say whether its uninstallers touch Reader, so select only Creative Cloud entries in the Cleaner Tool and check that Reader still opens afterwards. The full Acrobat, when Creative Cloud installed it, goes in Step 1.
Is it safe to delete the Adobe folder in Library?
Only when every Adobe app is gone, Reader included, and your files are copied somewhere safe. That is Adobe's own condition for removing the shared Adobe folders. While any Adobe app stays, remove only items named for Creative Cloud or for the apps you removed.
Will reinstalling Creative Cloud bring back my apps and settings?
You reinstall each app yourself, and kept settings can only come back if you chose Keep and skipped Step 5. Cloud documents and Libraries stay in your Adobe account. Files that only lived in the old Creative Cloud Files folder will not come back, since Adobe ended that sync.
Removing other apps from this Mac
Creative Cloud is one of the heavier cleanups. The other guides here follow the same shape: removing Kaspersky and its system extension, clearing Trend Micro's leftovers and uninstalling Sublime Text without leaving subl behind. If you are weighing an uninstaller app against doing it by hand, this comparison covers the manual route too.